top of page
1979 MG Midget Restoration:
The Barn Find:
Purchased car had a non-functioning dash board... No working speedometer, tachometer, coolant gauge.... if it was on the dash it wasn't working.
Engine was misfiring and shaking like a leaf!
With no garage, and my apartment manager getting tired of me turning the parking lot into my own mechanic shop, my kitchen table became my work bench!


Step 1: Pull the Dash & Take Inventory
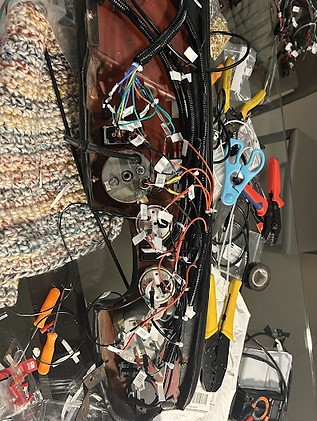
After removing much of the interior (seats, upholstery, steering wheel) it was time to take the dash board off to see why nothing was working.
Didn't take long to find that there was an electrical fire at some point, charring most of the wires behind the dash and in the engine bay. Not to mention the hornets nest that found refugee behind the dash.
Now I could go online and buy a new harness for over $600, or I could buy about $50 of wire and connectors and build my own harness - I'm sure you can guess which route I took
Step 2: Building my Own Wire Harness
After consulting the ancient scrolls (a 50 year old maintenance manual), forum posts of those who claimed to be professional race car drivers, and the odd YouTube video I went to work recreating the original wire harness on my dining room table.
After roughly 40 hours of soldering, crimping, continuity tests, labeling my work, and noting any schematic changes in my maintenance manual the dashboard was complete.
Additionally, I 3D printed new nylon bezels to replace the cracked ones on the dash, being sure to sand them down for a nice surface finish.


Step 3: Rebuilding the Carburetor
Now it was time to start on the infamous black-box that is a carburetor. After dismantling the entirety of the carburetor I found quite a few suspects to as why the engine was struggling to pull any air or fuel.
For starters the gaskets around the fuel bowl have completely disintegrated! Not only did this ruin the vacuum that should exist in the bowl but the carburetor was blowing fuel and fuel vapors into the surrounding environment. New gaskets and resurfacing the bowl's mating surfaces on a vertical mill did the trick.
On top of this the needle was bent causing it to remain stuck in the fuel jet, its a miracle any gas was getting into the engine at all. A junk yard find of a new needle and jet was swapped in to solve my problem.
After giving all components a good clean in an ultrasonic tank (courtesy of my work place) filled with carb cleaner, it was ready to be put back on the car.
Step 4: Clean Up Distributor and Reset Timing
Opening up the distributor a couple things were apparent! For one the contact points were terribly dirty and pitted. With a little steel wool and elbow grease they were looking like new and ready to conduct electricity.
But the second issue was that the contact points were set way to far a part so that the electricity couldn't consistently make the jump between the points. Using a feeler gauge and the manufacturer's stated contact point separation, they were moved together to be within spec.
Now to set the initial/static timing... With cylinder one at top dead center, I wired a simple lightbulb to the distributor to tell me when the circuit is closed. I simply turned the rotor arm towards the cylinder one lead until the lightbulb lit up - indicating a spark to be fired at cylinder one which has already been brought to top dead center.

Step 5: Bringing it All Together
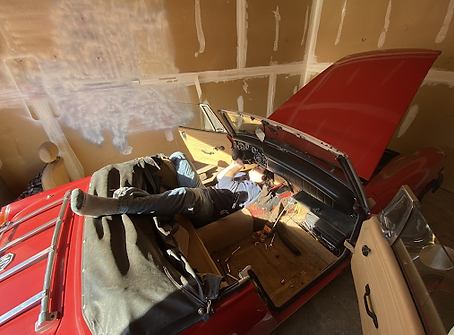
Now it was time to bring it all together!
The dash was reinstalled and the new harness connected to the old one. After noticing the turn signals would only work when the brake was pressed, I began to troubleshoot (in a very awkward and uncomfortable position) only to find some crossed wires.
With the dash in, the distributor already in place with static timing set, the only thing left to do was to reinstall the carburetor. With the carb in place and throttle and choke cable tensions set it was time to fire up the car.
Step 6: Listen to her go!!!
We're cooking with gas! To my surprise the engine turned over and stayed running on the first try!
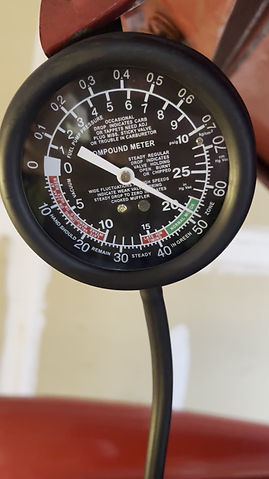
With that done, the final step was to set the dynamic timing with my timing light, crawling under the car to see the timing marks the engine was receiving a spark at top dead center as set by the static timing. Twisting the distributor I was able to retard the timing by 10 degrees to the manufacturer's stated specification.
Checking my vacuum timing gauge, I was getting values that indicated good timing and a healthy running engine.
With the timing set all that was left was to take it for a test drive! Not only was the car now running and driving but everything on the dash was now functional.


The End Product
Is the car show worthy? No. Is the car pulling sub 10 second quarter mile runs?! Also no. But is the car a real conversation starter? You bet. Do I enjoy riding around town with the top down with my friends? You better believe it.
It might not be the fastest or cleanest looking car, but that was never the point. I wanted to turn a rotting barn find into a running car that I am proud to call my own little project.
bottom of page